Friday, May 31, 2013

Shaker Pickles

One of the best sweet pickles I have ever made. Super easy and delicious. I use them on sandwiches, burgers or just a nice side condiment. They have a nice crunch when you bite into them too.
10 medium cucumbers, sliced  (maybe more depending on the size of cucumbers)
4-8 onions, sliced

Fill gallon jar with sliced cucumber and onions (depending on taste).

Mix together:
3 1/2 cups sugar
3 cups distilled white vinegar
1/3 cup pickling salt
1 teaspoon alum
1 teaspoon celery seed
1 teaspoon mustard seed
1 teaspoon turmeric

Pour mixture over cucumbers and onions, cap the jar,  give it a shake, and place jar in refrigerator. Shake once a day for six days. Then pickles are ready for use. Store pickles in refrigerator, where they will keep for several months.

Although, this is not a canning recipe I am including it here because during the canning season I put up 6 or so jars for all year eating. Just make them at different stages of the canning season and you should be good to go all winter long. I label them clearly so I know how long they have been in the fridge. That is if I can keep them that long. I've been known to run out. Thanks to friends and family that snatch a jar or two during a visit.

~ Farmgirl


Pin It

Waikiki Meatballs

Beefy meatballs flavored with ginger, simmered in a sweet pineapple sauce.
Serves 6

Meatballs:
1 1/2 pounds ground beef
2/3 cup crushed saltine cracker crumbs
1/3 cup minced onion
1 egg
1/4 cup milk
1 1/2 teaspoons ground ginger
1/2 teaspoon salt
1 tablespoon olive oil

Sauce:
2 tablespoons cornstarch
1/2 cup packed brown sugar
1 (15 ounce) can pineapple chunks- drained, with juice reserved
1/3 cup distilled white vinegar
1 tablespoon soy sauce
1/3 cup chopped green bell pepper

Directions:
In a large bowl, combine ground beef, crack crumbs, onion, egg, milk, ginger and salt. Shape mixture by rounded tablespoonfuls into meatballs.

Heat olive oil in a large skillet over medium heat. Place meatballs in skillet and cook until evenly brown, and meat is no longer pink. Drain excess fat.

In a small bowl, combine the cornstarch, brown sugar, reserved pineapple juice, vinegar, and soy sauce. Mix until smooth, then pour into the skillet with meatballs. Cook, stirring constantly, until mixture thickens and boils, about 5 minutes. Stir in the green pepper and pineapple chunks. Heat through.

Serve over hot cooked rice or hoagie buns.

~Farmgirl


Pin It

Thursday, May 30, 2013

Mama's Wonderful Salsa

This truly is a wonderful salsa. My family can't get enough of it. 
makes 6 pints
8 cups tomatoes, peeled, chopped and drained
2 1/2 cups onions, chopped
1 1/2 cups green peppers, chopped
1 cup hot banana peppers, chopped
6 cloves garlic, minced
2 teaspoons cumin
2 teaspoons ground black pepper
1/8 cup canning salt
1/3 cup distilled vinegar
1 (15 ounce) can tomato sauce
1 (12 ounce) can tomato paste
1 tablespoon cilantro
1/2 cup cider vinegar
1/3 cup sugar

Combine all ingredients in a large sauce pot. Bring mixture to a boil 10 minutes. Reduce heat and simmer 10 minutes. * For a thicker salsa: cook down till desired thickness. For me its about an hour.

Ladle hot salsa into hot jars, leaving 1/2 inch head space. Adjust two-piece caps. Process 15 minutes in a boiling water bath canner.

* Note: When cutting or seeding, hot peppers, wear rubber gloves to prevent hands from being burned.

~ Farmgirl


Pin It

Wednesday, May 29, 2013

How to Use a Pressure Canner

So I know how overwhelmed new canners feel when they get their new canner and manual out of the box. Than manual in it's self is enough to give a person a good case of anxiety. When I got my new All American I felt the same way. I sat down and read my manual from cover to cover and back and forth. Some of it was Greek to me, but I figured it out.

So, I have seen a few articles about using your pressure canner and they have been very informative. Well I just got the current issue of Mother Earth News in the mail and low and behold a great quick article on how to use your pressure canner was included. I have to say its one of the best ones I have seen in a long while. So I'm going to share it here with you.

This article assumes you have went through your equipment thoroughly to make sure its in good working condition.

Lets get started:

What You'll Need
Pressure canner
Canning jars with rings and new lids
Canning funnel
Jar-lifting tongs
Pots, bowls, measuring cups and spoons
Plastic knife or wooden chopstick for removing air bubbles (metal knives can scratch glass jars)

Assemble Equipment and Ingredients. Though many sources will tell you to sterilize everything, this step is unnecessary. Pressure canning will kill all potential pathogens. Just start with clean equipment and a clean work surface. Discard any jars with nicks in the glass.

Prepare Recipe. Some recipes require you to pack raw food into the jars and then pour hot liquid over the food. With others, you'll cook the food and then pack it hot.

Fill Jars. Be sure to leave the proper amount of headspace (the amount of space between  the top of the food or liquid and the jar's lid.) Recipes should indicate how much headspace is necessary. (The space is needed for the expansion of the food in the jar.)

Seal Jars. Remove air bubbles by stirring with a plastic knife or chopstick. Wipe the jar's rim clean (a bit of vinegar on a cloth can cut through grease), set the lid on the rim, and twist on the ring just until it resists. Don't over-tighten. (Over tightening causes the lids to buckle.)

Prepare the Canner. Place jars on a rack in the canner and add 2 to 3 inches of water, unless otherwise specified. Secure the canner lid into its locked position. If using a weighted gauge, remove the weight. If using a dial gauge, open the petcock. Heat the canner over high heat until steam escapes. Allow steam to vent for 10 minutes. Attach weight or close the petcock. Bring the canner to your recipe's recommended pressure using the high heat setting.

* Set a Timer: Begin timing when the weighted gauge is jiggling steadily (about 2 to 3 times per minute) or when the dial gauge displays the recipe's recommended pressure. Be vigilant, and adjust the heat often to maintain the lowest heat under the canner that will keep the appropriate pressure. Remove the canner from the heat after the required time has elapsed. Jiggler Video Here

Let the Canner cool. Leave the canner alone until the pressure has released naturally, about 30 minutes for quarts. Some models have a feature that will alert you when the pressure is normal. (Depending on the heat in your home this could take longer)

Remove the Weight or Open the Petcock. Let the canner sit undisturbed for a few minutes, then remove the lid. Lean back to avoid a steam burn. Let the open canner stand for 10 minutes.

Let the Jars Cool. Place a towel on the counter. Using a jar lifter, remove the jars to the towel, keeping them an inch apart to allow for air circulation. Let the jars cool for 12 to 24 hours, and then check the seals. The lids should not have any give when you press firmly on the center. If any jars didn't seal, process them a second time.

Fill Your Pantry. Be sure to label jars with the date and contents. Remove the metal rings, as they can corrode during storage. Rings can be reused, but lids should not be.

Eat Up! For best quality, consume within 12 months, but can be consumed many more months past this. (I've eaten food that has been 3 years old).

This article came from Mother Earth News.

~ Farmgirl


Pin It

Monday, May 27, 2013

Beer-Brined Chicken


I had some friends come in from Virginia this weekend and not just any recipe would do for grilling chicken for them. I had to break out one of the best I have learned to make. This is one of my favorite go-to recipes when making chicken on the the grill. The chicken comes out so tender and pretty juicy. I made it this time with chicken breasts (wont be as juicy as the thighs) but its great with thigh meat also.

It's great severed up with many different sides. This time I paired it with corn on the cob and a nice hearty salad and my friend had brought up a carrot cake with walnuts and pineapple. It was so so delish. I'm still trying to figure out how she knew that I LOVED carrot cake.

Brine:
2 cups water
1/4 cup kosher (coarse) salt
1/4 cup packed brown sugar
4 (12 oz) bottles beer, chilled
2 cut-up whole chickens (3 to 31/2 lbs each) (for this recipe I used 6 lbs of chicken breasts)

Barbecue Rub:
1 tablespoon paprika
1 teaspoon seasoned salt
1/2 teaspoon onion powder
1/2 teaspoon garlic powder
1/2 teaspoon pepper

1/4 cup vegetable oil (for brushing on chicken while on the grill)

In a 6 to 8 quart noncorrosive (stainless steel, enamel-coated or plastic or  large ziploc bag) container or stockpot, mix water, kosher salt and brown sugar, stirring until salt and sugar are dissolved. Stir in beer ( it will foam some). Add chicken. Cover; refrigerate at least 8 hours but no longer than 24 hours.

Line 15x10 inch pan with sides with paper towel. Remove chicken from brine; rinse thoroughly under cool running water and pat dry with paper towels. Discard brine. Place chicken in pan. Meanwhile, in small bowl, mix all rub ingredients except oil; set aside.

Heat gas or charcoal grill for indirect cooking. Brush oil over chicken; sprinkle rub mixture over chicken.For two burner gas grill, heat one burner to medium; place chicken on unheated side. For one- burner gas grill, place chicken on grill over low heat. For charcoal grill, move medium coals to edge of firebox; place chicken over drip pan. Cover grill; cook 15 minutes.

Turn chicken over; cover grill and cook 20 to 30 minutes longer, turning occasionally, until juice of chicken is clear when thickest piece is cut to bone (170 degrees for breasts; 180 degrees for thighs and drumsticks).

Makes 8 servings

Note: The picture above I dredged my chicken in the rub. I like it the rub on pretty thick. So if your like me you may want to make double or triple rub.


Pin It

Sunday, May 26, 2013

Oh my my, Strawberry Pie

There's nothing like celebrating the "unofficial" first day of summer with strawberry pie. So when I saw how quick and easy this recipe was I had to try it. It was gobbled up so fast that I didn't get a serving photoed. I'm thinking I will have to make another and make it soon. 


3 Tablespoons cornstarch
1 cup sugar
1 1/2 cups water
3 oz box strawberry Jell-o
2 cups sliced strawberries
Pre-baked 10" pie shell (click here for recipe)

Line bottom of pie shell with the sliced strawberries. 

Combine cornstarch, sugar and water in a small saucepan. Bring to a boil and simmer, stirring constantly, until thickened (this happens really quick). Add the Jell-o and stir until dissolved. Pour over the strawberries and refrigerate until set.

Serve with whipped cream.

~ Farmgirl


Pin It

Good friends; Good eats

I found out mid last week that I was going to have weekend visitors. My good friend Diane and her husband, Calvin was coming to my house. OMG! I just couldn't believe it. I thought for sure that if they got a chance to take a mini vacation that they would of went to the beach, but instead they were coming to see me. I felt special.
This is from our visit in Jan 2013.
See I met Diane and Calvin on-line about the same time we moved back to WV, so that's been nearly 9 years ago. We chatted on-line 6 years before we got to meet for the first time in person. This weekend was the third time we've got together. We went and visited them down in VA in January.

This weekend we got to sit around and visit. We all went out for a little bit. I just hated that my husband missed almost all of it because he was working. Next time we'll have to do some planning so we all can visit. I foresee a trip in my near future.

I cooked up a storm just prior to their arrival. Saturday we had pulled pork sandwiches, pasta salad, coleslaw, baked beans, and strawberry pie. On Sunday I made beer-brined chicken, salad, and corn on the cob. Diane surprised me with a homemade carrot cake, which is my favorite. It was a great weekend filled with laughter and food. What a way to end the month of May.

I hope everyone had an enjoyable weekend.

~ Farmgirl


Pin It

Friday, May 17, 2013

General Tso's Chicken - Weight Watchers

I've always been a larger framed gal and I've always had to watch what I eat. I know there's many out there that think I cook and I don't pay attention to the calories and what not, but that's far from the truth. I have always said eat in moderation no matter what it is. But, this recipe I bring you today is one from Weight Watchers; although it don't taste like it. Believe it or not this is one of my kids favorites.


3/4 cup canned reduced-sodium chicken broth
2 tablespoons cornstarch
2 tablespoons sugar
2 tablespoons low sodium soy sauce
1 tablespoon white wine vinegar
1/2 teaspoon ground ginger
2 teaspoons peanut oil
2 medium scallions, chopped
2 medium garlic cloves, minced
1/2 teaspoon red pepper flakes or 1 dried chili, minced
1 lb uncooked boneless skinless chicken breast, cut into 2 inch pieces
2 cups cooked white rice, kept hot

In a medium bowl, whisk together broth, cornstarch, sugar, soy sauce, vinegar and ginger; set aside.

Heat oil in a wok or large skillet over medium-high heat. Add scallions, garlic and pepper and cook 2 minutes. Add chicken and cook until browned all over, about 5 minutes.

Add reserved sauce and simmer until sauce thickens and chicken is cooked through, about 3 minutes.

Serve chicken and sauce over rice. Yields 1 cup of chicken and sauce and 1/2 cup of rice per serving = 4 points.

Happy cooking!

~ Farm Girl


Pin It

Finally Garden Time

Since the cold spell seems to have been broken and the rain has held off for the most part, I have been making the most of every dry spell to get in the garden the last few days. So here's a few pictures of the past few days.
DH discing the garden one more time.
Just so happens when I was in town getting groceries I found a new garden plant and flower store set up. So I purchased 5 flats. I sure hope they do good. They looked amazing compared to what I found at other stores that I normally got plants from.


Funds were super tight and I forgot to stop at the feed store so I bought some packaged Burpee seeds at Wal-Mart. Not my favorite place but they will do in a pinch. 

You can barley see in this picture but there is 10 rows of established plants planted. Thanks to my friend's and my children that helped.


To show my appreciation I made dinner for everyone. Least I could do. Our friends live in town and live in an old swamp area and the only gardening they can do is container. So I told her if she would come and help and help purchase some plants that I would tend the garden. Should be enough for both of us, at least I hope so. 


Cabbage and 5 rows of green beans. I still need to plant my peas and lima beans and more corn. But, we are getting there. I'm just glad to get this much done. Now to water and pray for a good garden this year.

I'm wondering how everyone else is doing with their gardening this season.

~ Farm Girl


Pin It

Wednesday, May 15, 2013

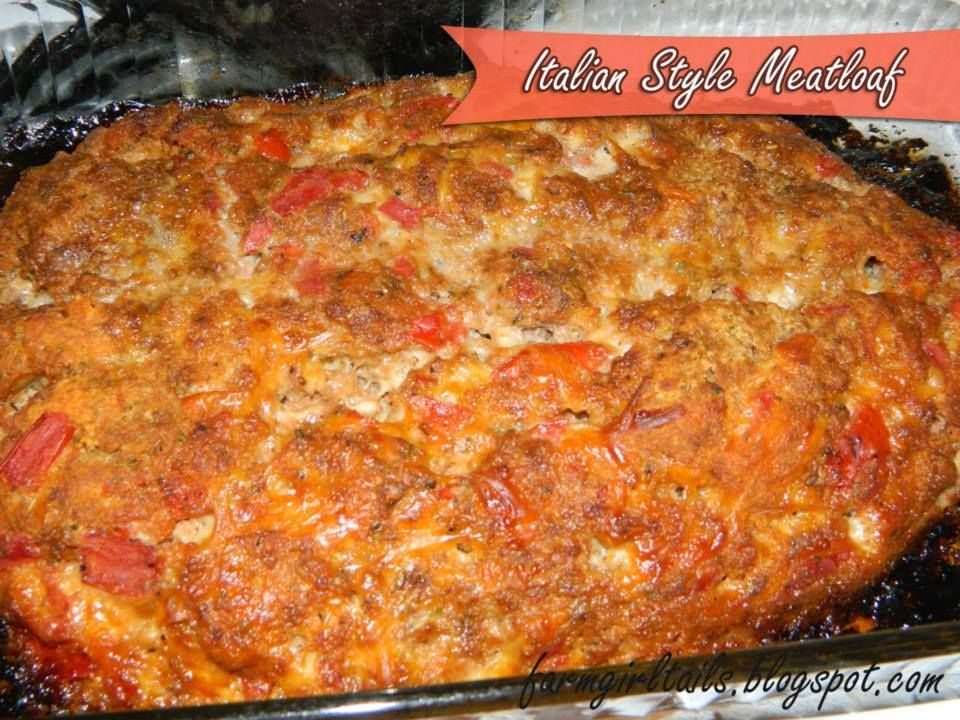
Italian Style Meatloaf

Your going to learn something new about me here today. I'm a freak for meatloaf. But, I don't like the same meatloaf over and over, so I try different ones every chance I can get. Why, well because burger is cheaper than steak and we also raise beef cattle so I always have an abundance of it. We'll usually I do. Just recently ran out. Bummer!

The Italian Style Meatloaf I'm sharing here today is a new one for us. I made it a few weeks ago. We really did enjoy it. With my family if you add cheese to it they'll eat anything.


1 pound ground beef
2 eggs beaten
3/4 to 1 cup bread crumbs
1/4 cup ketchup
1 teaspoon Italian seasoning
1 teaspoon dried oregano
1 teaspoon dried basil
1 teaspoon garlic salt
1 (14.5 oz) can seasoned diced tomatoes, drained (I used Hunt's Basil and Oregano flavoring)
2 cups shredded mozzarella cheese

Preheat oven to 350 degrees F.

In a large bowl, mix together ground beef, eggs, bread crumbs and ketchup. Add in the Italian seasoning, oregano, basil, garlic salt, diced tomatoes and cheese. Press into a 9x5 loaf pan if desired or shape into loaf log in a 9x13 baking dish, cover loosely with foil.

Bake 1 hour or until internal temperature reaches 160 degrees F.

Enjoy!

~ Farm GirlPin It

Monday, May 13, 2013

Hot Dog Sauce

There's nothing I like better at a good ole cookout besides a hot dog with sauce and onions. (Shh, sometimes I like it piled high with slaw too.) It can't be any ole sauce either, it has to be homemade. The store bought just don't do it for me; maybe its because I'm totally spoiled or something. So any how I'm on a mission to find the best sauce this season. I make mine from scratch all the time and I have never wrote down the recipe; its always been a dash of this, a pinch of that and so on. So come along with me on my journey to find the ULTIMATE hot dog sauce out there. By the way, if you have a sauce I must try please email it to me.

Ingredients:
1 pound of ground beef, chuck (for this recipe I used ground turkey, was out of beef)
1 onion, finely chopped
3 cloves garlic, minced
1/2 cup ketchup
1/4 cup barbecue sauce
1 tablespoon chili powder
2 tablespoons prepared yellow mustard
1/2 teaspoon ground black pepper
2 teaspoons salt, or to taste
2 teaspoons ground cumin
1 tablespoon Worcestershire sauce
1 pinch crushed red pepper flakes
1 cup water

Directions:

Brown beef and onion in a large skillet over medium-high heat. Drain fat; cool mixture slightly. Place in a food processor; pulse until mixture is finely crumbled, about 5 or 6 pulses. Return meat  to skillet; stir in garlic. Cook for 3 minutes.

Mix in ketchup and barbecue sauce. Stir in the chili powder, mustard, pepper, salt, cumin, Worcestershire sauce, red pepper flakes, and water. Cook, uncovered, until most of the liquid has evaporated, about 10 minutes. Season sauce with additional salt, if necessary.

Makes 3 cups

Come on give it a try

~ Farm Girl

Recipe source allrecipes.com

Pin It

Sunday, May 12, 2013

Amish Cinnamon Bread


Super easy sweet bread. This no kneading, just mix it up and bake it bread. Makes a wonderful dessert or even quick breakfast.
Makes 2 loaves

Batter:
1 cup butter, softened
2 cups sugar
2 eggs
2 cups butter milk
4 cups flour
2 teaspoons baking soda

Cinnamon sugar mixture:
2/3 cups sugar
2 teaspoons cinnamon

Grease two 9x5 loaf pans. Set aside until needed.
Cream together butter, 2 cups sugar, and eggs. Add milk, flour, and baking soda. Mix well.
Put 1/4 of batter in each greased loaf pan.
Mix in separate bow the 2/3 cup sugar and cinnamon. Sprinkle 3/4 of the cinnamon mixture on top of the batter in each pan. Add remaining batter to pans; sprinkle the remaining cinnamon topping. Swirl with a knife. Bake at 350 degrees in a preheated oven for 45-50 minutes or until toothpick tester comes clean.

Cool in pan for 20 minutes before removing from pan.

Excellent if eaten warm out of the oven but great toasted with a little butter or cinnamon butter.

Enjoy!!

~ Farm Girl


Pin It

Mother's Day

I woke up to a very nice facebook message from my daughter and a card that she hand drew a hummingbird and wrote a message on. She is 15 and a very good artist. Which she definitely didn't get from her Momma. (insert frowny face here) My son, who is 16,  however has been off fishing with friends since Friday and he went to his weekend job yesterday. When he finally came home today he brought me home a hanging basket of flowers. I guess all the boys went and picked out their mothers flowers. Very sweet of them. This Momma is very happy to have her kids home. I know one day soon both of the kids will be off doing their own thing and cards and phone calls will be all that I get for a while, until they grace with with grand babies. Hopefully that will be a while to come.

I also talked to a good friend from Virginia this morning. We are so much alike it just isn't funny. It's always nice to talk with her. We seem to never fail calling each other on special days.

I hope all you mothers out there have a wonderful day!!

~ Farm Girl


Pin It

Friday, May 10, 2013

Blueberry Breakfast Scones

I've only made these one time; that's only because I had misplaced the recipe. Now that I have found it again. I will be making them often. I know everyone in my family really did enjoy them. I enjoyed watching them devour them as they are a healthier option than most cereals and other breakfast foods they usually choose. Not to forget they are also pretty.  :)


Nonstick cooking spray
1 - 1/2 cups all purpose flour
1/2 cup white whole wheat flour or whole wheat flour
1/4 cup sugar
1 tablespoon  baking powder
1 tablespoon finely shredded orange peel
1/4 teaspoon baking soda
1/4 teaspoon salt
1/4 cup butter
1 egg
1/2 cup buttermilk
1 teaspoon vanilla
1 cup fresh or frozen blueberries
1 recipe Orange Glaze (follows this recipe)

Preheat oven to 400 degrees. Lightly coat a baking sheet with nonstick cooking spray; set aside. In a large bowl stir together all purpose flour, whole wheat flour, sugar, baking powder, orange peel, baking soda, and salt. Using a pastry blender, cut in butter until mixture resembles coarse crumbs. Make a well in the center of the flour mixture.

In a small bowl whisk together egg, buttermilk, and vanilla. Add egg mixture all at once to flour mixture; stir just until moistened. Gently stir in blueberries. (Do not thaw frozen blueberries; thawed berries will discolor the dough.) Mixture will not completely come together in a ball.)

Turn out dough on a lightly floured surface. Knead dough by folding and gently pressing dough for 10 to 12 strokes or until nearly smooth. Transfer dough to the prepared baking sheet; pat or lightly roll dough to a 7 inch circle. Cut circle into 10 wedges. Separate wedges so they are about 1 inch apart.

Bake about 15 minutes or until golden brown. Remove from baking sheet. Cool slightly on a wire rack. If desired, drizzle scones with Orange Glaze. Serve warm. Makes 10 scones.

Orange Glaze: In a small bowl stir together 3/4 cup powdered sugar and 1/4 teaspoon finely shredded orange peel. Stir in enough orange juice or fat free milk (3 to 4 teaspoons) to make drizzling  consistency.

Nutrition Facts:
Calories 171, Total Fat 5 grams, Cholesterol 34 mg, Protein 4 grams, Carbohydrate 27 grams, Fiber 1 gram, Sodium 215 mg


Items You May Be Interested In:

Pin It

Wednesday, May 8, 2013

Early evening visitors

Sitting on the porch this evening waiting for the daughter to get home and out of the corner of my eye I see something moving over in the trees. Low and behold it was two squirrels feasting on the expired blooms of the wild cherry tree.  Here are a few pictures of the critters visiting my yard.


The bird landed on the feeder stand not 15 feet from me. It was so nice to see all the critters out and enjoy the day just as much as I was.

Hope everyone had a lovely evening

~ Farm Girl


Pin It

Operation Duck and Chicken Run

A few days ago I bartered a few jars of jelly for two ducks. I'm staring to get a hang of this bartering as I have done it a few times here lately to get things I needed or wanted for the farm and such. We got the ducks but didn't have any place to keep them. I couldn't turn them loose because my neighbors dogs would have them for an appetizer and I'm sure my two cats would chase them around and may even harm them. So we had them cooped up in travel kennel till we could get them something more fitting. 

It's been raining here for  a few days. The husband and I got up early and used the early morning hours to build a makeshift run for them from items we had already here on the farm. I found a few ideas on pintrest that would work great! I'm loving that site.

So we took the old swing set I got for FREE a few years ago. Borrowed the timbers from my blueberry bed. Purchased the netting and used some leftover rabbit wire for their door. Hubby also borrowed a tarp that wasn't being used from his parents to make them a shaded and dry area for when it starts to rain hard again. I think we have a total of $12 in the whole thing so far. I want to paint the swing set just to help protect it from more rust. 

Over all we are very pleased with how it came out and I know the ducks; Quackers and Cheese are very thankful for a large area to roam in.

Quackers and Cheese in the dog kennel
Enjoying some fresh water.

I'll take more pictures as I get the finishing touches on the run in the next few weeks.

Have a wonderful day!!

~ Farm Girl


Pin It

Thursday, May 2, 2013

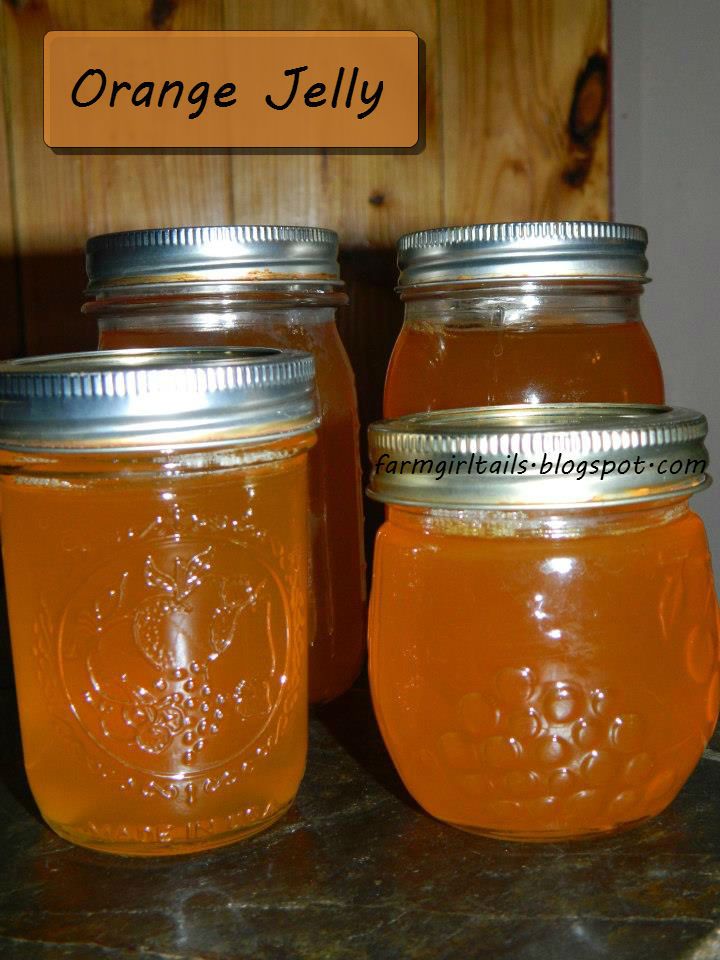
Homemade Orange Jelly

This recipe is one I found on another blog and I was thrilled to have found it. During the summer months when I'm grilling out, I use a lot of orange marmalade when making my rib sauce. I've never been a huge fan of the marmalade but loved the flavor. Now, with this orange jelly I can use it as a substitute. Which makes me one happy girl. It works out great also.

I've mainly made freezer jams since I started canning on my own. It's only been about 4 years that I've been experimenting with making different jams and jellies for the shelf. This is one that I'm happy to make every fall when the FFA citrus fruits come in. I hope that you enjoy this jelly just as much as I do.


3 1/2 cups  freshly squeezed orange juice (approx. 8-10 medium to large ripe oranges)
1  box (1 3/4 oz)  pectin
5 cup sugar

Juice oranges the old fashioned way with a juicer and some elbow grease. Strain the juice with a cheesecloth, paper towel or coffee filters. This step makes your jelly clearer and prettier. In my opinion.

Pour the juice into a large pot, add the pectin packet and 1/4 cup of your 5 cups of sugar. Bring to a rolling boil, then add the remaining sugar. Return to a rolling boil, stirring constantly for 1 minute. Skim off any foam. (**Note- As one of my friends pointed out to me because i forgot naturally, you can add 1/4 to 1/2 tsp butter then bring the mixture to a boil, this will reduce and sometime eliminate the foaming.)

Ladle jelly into sterilized jars. Clean rim and place sterilized lids on jars, tighten the rings over the flat lids. Process in a boiling hot water bath for 5 minutes. Remove from BWB and let sit on towel for 24 hours for the jelly to set up.

Happy Canning

~ Farm Girl

Pin It

Wednesday, May 1, 2013

Lemon Chicken

I love, love, love lemon chicken and there are so many ways to make it. But, for me I find that every time that I have a craving for lemon chicken, I either don't have any chicken thawed out or I'm running on borrowed time. This recipe here will solve everyone's dinner woo's. You'll love the moist lemony chicken dish great severed with buttered noodles or even a baked potato.


1 medium onion, chopped
4 garlic cloves, minced
1 to 3 tablespoons olive oil
4 bone-in or boneless chicken brest halves, skin removed (I prefer boneless chicken)
1 cup chicken broth
1/4 cup water
1/4 cup lemon juice
3/4 cup minced fresh parsley (2 tablespoons of dried parsley is fine also)
1/2 cup chopped celery with leaves
1-1/2 teaspoons Italian seasoning
1/2 teaspoon salt, optional
1/4 teaspoon pepper
4-1/2 teaspoons cornstarch
3 tablespoons cold water

In a pressure cooker, saute onion and garlic in oil until tender; remove with a slotted spoon and set aside.

Brown the chicken, a few pieces at a time, in the cooker. Return onion mixture and all chicken to pan. Add broth, water, lemon juice, parsley, celery, Italian seasoning, salt if desired and pepper. Close cover securely; place pressure regulator on vent pipe. (if you have a weighted gauge with lbs select 10 lbs.)

Bring cooker to full pressure over high heat. Reduce heat to medium-high and cook for 8 minutes. (Pressure regulator should maintain a slow steady rocking motion; adjust heat if needed.) Immediately cool according to manufacturer's directions until pressure is completely reduced. Remove chicken and keep warm.

Measure pan juice; return 1 1/2 cups to pan. Combine cornstarch and cold water until smooth; stir into pan juices. Bring to a boil; cook and stir for 2 minutes or until thickened. Serve over chicken.

Yeild: 4 Servings.

** Note: You can use half thawed or even frozen chicken in this recipe. You can skip the browning of the chicken. Just put all ingredients in pressure pot. Add a few extra tablespoons of lemon juice and 1/4 cup extra water and pressure cook for 20 to 25 minutes.

I hope you enjoy this Lemon Chicken just as much as my family does.

Happy Cooking!!

~ Farm Girl

* Orginal recipe from Quick Cooking July/August 2000 magazine. 


You will need to use one of these for this recipe: Pressure Cooker


Pin It